Removing paint from 19th Century, Plaster Ceiling Medallions
One of my latest restoration challenges was stripping many layers (at least eight) of paint from four plaster ceiling medallions. Still doing work in Kelli and Tom Kline's 1887 Victorian home here in Oak Park, we were dissatisfied with the many paint layers which seemed to be hiding delicate plaster details.
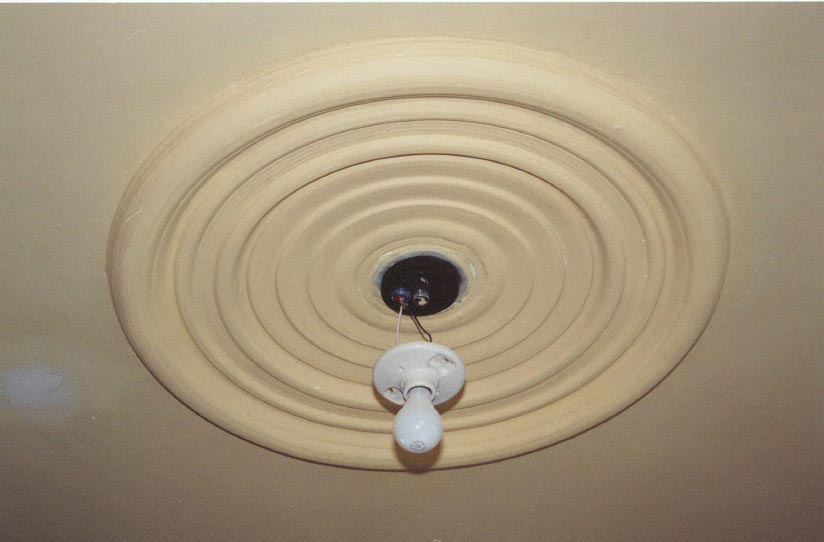
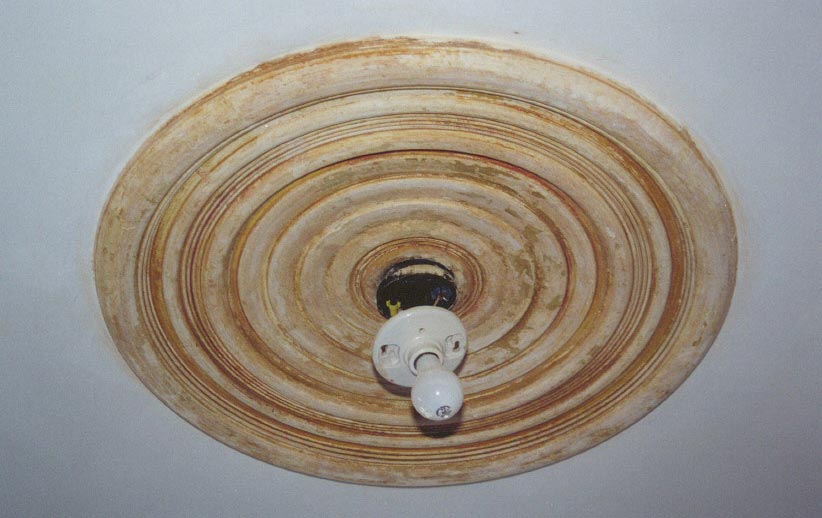
We put off doing this project because we thought it would be difficult and complicated. It turned out to be much easier than we thought! For our project, each medallion took about four hours to strip, start to finish. We are very happy with the process and the results. Below are before-and-after photos. Notice the crispness of the details that were exposed after stripping, and the absence of damage or tool marks that could have been caused by the paint removal process. Our process was so non-aggressive and non-abrasive that you can see the original tool marks of the plasterers who made the medallions!
![]()
Here is how we did it:
Having tried removing paint from plaster in the past with solvent based chemicals, I have never had good results. The problem with those types of strippers is that the porous plaster quickly absorbs the solvent, and the stripper dries to quickly before it can do the work. Another problem is that conventional strippers require excessive amount of tool work, thereby greatly increasing the risk of leaving tool marks, or breakage of brittle plaster.
Our stripping solution in this case was to use a poultice style remover called "Peel Away". This remover consists of the chemical, sodium hydroxide infused in a thick paste. It is applied easily with a plastic spatula and then covered with a special paper (that is provided with the stripper). Then you just let it sit for the proper waiting period. Different situations require different waiting periods to allow the chemical to work, but generally I wait 12- 16 hours.
In the case of these plaster medallions, I applied the "Peel Away" 1/4 inch thick, covered it with the paper and left it sit about 12 hours. (The same problem of absorption happens here, so if you let it sit too long, it will dry out too much, and you will have to do a lot of dry scraping with your tools.)
When ready, the paper and most of the paint and dried remover came away easily. A variety of metal and plastic scraping tools helped me to get off the rest of the residue very easily. I didn't have to get it all off perfectly. Once most of the rough stuff is removed, I used a brush (with plastic bristles - sodium hydroxide tends to dissolve or degrade natural fiber bristles), a synthetic sponge and just plain water. There is no heavy scrubbing required, just the application of lots of water, going over the whole area several times.
The last step in the whole process was neutralizing ALL surfaces that came in contract with the remover. Sodium Hydroxide is a strong alkali. If any residue is left on (or below) the surface, it will cause unwanted problems later, after painting. Dried sodium hydroxide crystals still remaining on or below the surface can be reactivated at a much later date by moisture - for example, high humidity.
Therefore, if you don't neutralize properly, you might strip and paint the surface in the Fall, and have no chemical reaction until the following Summer when the humidity goes up. Trust me, as a contractor, it is no fun to get a call-back eight months after a job is complete, decorating is finished and the family has moved in! Not only will you lose money, you will have a very unhappy client. Neutralizing is a very simple step - Don't skip it!
A mild acid is all that is required for neutralization. In the case of our plaster medallions, I used vinegar in several applications over several days. I avoided using anything stronger, because the lime in the plaster is also alkaline and I wanted to avoid any chemical reaction with it.
For painting after, I recommend using a shellac based primer or an acrylic (because it is also acid - for extra insurance).
![]()
The cost of doing one medallion if you decided to do a project like this yourself would be about $50 dollars in materials. Depending on where you live, it would cost about $150 - $250 in labor to hire a contractor to do the work.
For safety, well fitting stripping gloves and plastic goggles are a necessity for this work. I also always wear long sleeves and long pants when using this type of remover. Keeping a bucket of clean water handy to wash hands and tools etc. is a good idea.
"Peel Away" comes with very good directions, has very little smell and is an excellent paint remover for certain specific applications.
![]()
All the supplies I needed for this project included:
1 large plastic drop cloth
1 ladder
Rubber stripping gloves
Plastic goggles
3 gallons of "Peel Away" paint remover
A variety of metal and plastic scrapers
1 plastic brush
1 plastic pail
1 synthetic sponge
2 gallons of vinegar
1 plastic spray bottle (for the vinegar)
Copyright © 2003 Martin Hackl